Vieme, že v dnešnej dobe je hlavnou komoditou čas a kvalita. Preto ponúkame osadzovanie DPS v TOP kvalite do už 48hodin od dodania DPS, šablóny a súčiastok.DPS osadzujeme a spájkujeme strojmi. Taktiež ponúkame obojstranné osadzovanie DPS a zmiešané osadzovanie DPS SMD + THT.
Do not hesitate to contact us anytime for a price bid: pcbassembly@hhes.sk pcbassembly@hhes.sk

– Strojové osadzovanie SMT od 01005, µBGA, flipchip
– Osadzovanie THT komponentov
– Osadzovanie do lepidla alebo bezolovnatej pasty
– Spájkovanie v ochrannej atmosfére
– Strojové spájkovanie THT vlnou alebo selektívnou vlnou
– od NPI – prototypových sérii až po veľké série
– DFM report a návrhy pre zefektívnenie výroby a zníženie ceny
– Strojová depanelizacia V-groove a frézovanie môstikov

– Strojová linková AOI kontrola osadených dosiek
– Strojová AOI kontrola nanesenej pasty 3D SPI
– AI kontrola prototypových sérii
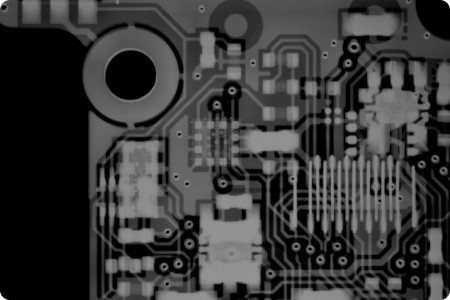
– X-ray Röntgenová kontrola osadených dosiek
– Metalografický výbrus DPS
– Funkčné testovanie (Ihlove pole)
– Vysokonapäťové testovanie
– Burn-in testovanie
– Testovanie v Environmentálnej komore s teplotným rozsahom -42°C to 180°C


– Nákupne a logistické oddelenie zabezpečí nepretržitú dodavku komponentov
– Projektové ceny komponentov pre dlhodobé projekty
– Poskytnutie skladových priestorov pre dlhodobé projekty
– Vákuové balenie materiálu pre dlhodobé skladovanie.
– Sušenie komponentov a DPS v súlade s IPC normou
– Všetky komponenty potrebne pre osadzovanie vieme zabezpečiť
– Asistencia a vyhľadanie náhrad komponentov EOL a Obsolete
– Spolupráca časť komponentov dodá zákazník a zvyšok my
– Možnosť dodania všetkých komponentov na osadzovanie
– Optimalizácia dizajnu pre výrobu a zníženie výrobných nákladov
– Optimálne panelizovanie vstupných dát pre linkové stroje
– Dizajn panelu DPS pre maximálne využitie plochy a jednoduchú depanelizaciu
– Príprava a výroba šablóny (stencil) podľa procesu
– Meranie materiálovej konštanty pre impedančné prispôsobene DPS
– Meranie S-parametrov pre impedančne prispôsobene DPS


Pick and place súbor obsahuje informácie o relatívnych polohách komponentov na DPS. Daný súbor sa nahrá do osadzovacieho stroja a následne sa porovná rozmiestnenie komponentov s osadzacím predpisom. Preferovaný formát je.csv file v mm.

Assembly drawing is usually a pdf file. The key is that components with polarity have a marked beginning or pin 1.

Súpiska materialu musí obsahovať nasledujúce parametre: Comment, Description, Designator, Footprint, Manufacturer, Manufacturer PN, Quantity a Value. Komponenty ktoré si želáte neosadiť označte DNP (Do-not-populate).

Gerber files sa spracujú na našom CAM oddelení. Vygenerujú sa šablóny pre Top a Bottom stranu. Pripraví sa panel a objednajú DPS podľa Stack-up a špecifikácie zákazníka.
| Cookie | Duration | Description |
|---|---|---|
| cookielawinfo-checbox-analytics | 11 months | This cookie is set by GDPR Cookie Consent plugin. The cookie is used to store the user consent for the cookies in the category "Analytics". |
| cookielawinfo-checbox-functional | 11 months | The cookie is set by GDPR cookie consent to record the user consent for the cookies in the category "Functional". |
| cookielawinfo-checbox-others | 11 months | This cookie is set by GDPR Cookie Consent plugin. The cookie is used to store the user consent for the cookies in the category "Other. |
| cookielawinfo-checkbox-necessary | 11 months | This cookie is set by GDPR Cookie Consent plugin. The cookies is used to store the user consent for the cookies in the category "Necessary". |
| cookielawinfo-checkbox-performance | 11 months | This cookie is set by GDPR Cookie Consent plugin. The cookie is used to store the user consent for the cookies in the category "Performance". |
| viewed_cookie_policy | 11 months | The cookie is set by the GDPR Cookie Consent plugin and is used to store whether or not user has consented to the use of cookies. It does not store any personal data. |
